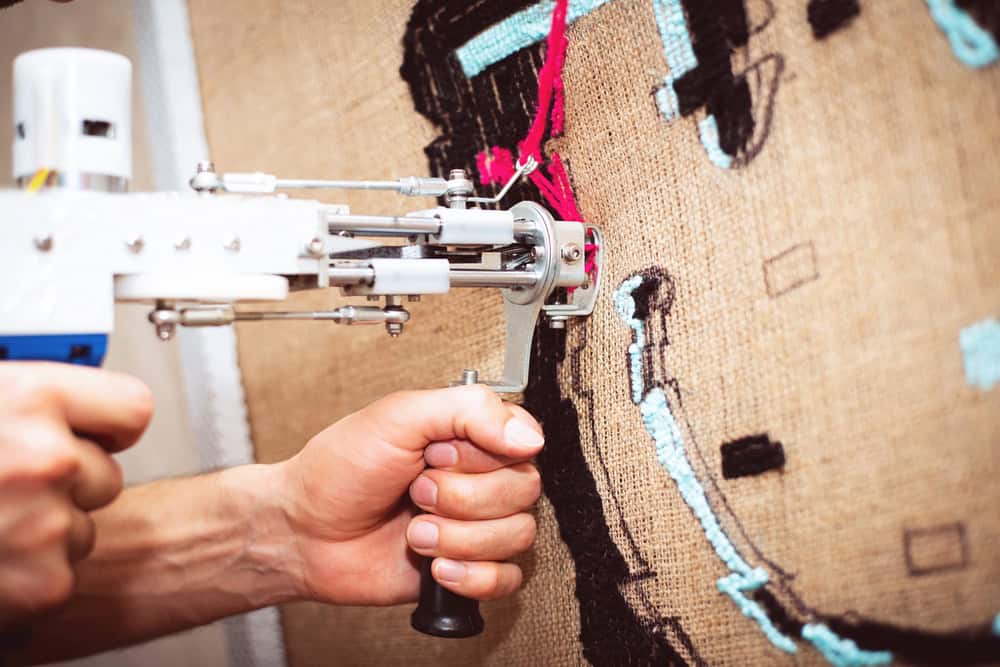
If you’ve spent any time on TikTok in the last couple of years, you’ve probably seen someone standing over a stretched piece of cloth, a power tool in hand that looks like a cross between a sewing machine and a hair clipper, punching thick rows of yarn into fabric to build a plush, colorful rug in a single afternoon. That’s rug tufting, and it has gone from a niche upholstery trade skill to one of the most-searched craft hobbies around, mostly because the finished product looks so satisfying and so unlike anything you’d make with a needle and thread. It draws people who want a tactile, visual hobby with a real object at the end of it, not just a screen.
Rug tufting uses a handheld tufting gun to push yarn through a stretched backing cloth on a frame, and a full home setup (gun, frame, cloth, yarn, glue, backing) realistically runs $300-$500 for your first rug, with $75-$125 in ongoing materials per project after that. If you’re not sure you’ll stick with it, a one-time studio workshop for $60-$150 gets you a finished small rug and hands-on instruction before you spend a dollar on gear. For the full range of hobbies beyond fiber crafts, browse our master list of interests and hobbies.
Disclosure: some links on this page are Amazon affiliate links. As an Amazon Associate I earn from qualifying purchases.
Table of Contents
- What Is Rug Tufting?
- What It Costs to Start
- How to Get Started
- Beginner Mistakes to Avoid
- Is Rug Tufting Right for You?
- FAQ: Rug Tufting for Beginners
What Is Rug Tufting?
Rug tufting is a craft where you use a motorized tufting gun to punch loops or cut strands of yarn through a piece of backing cloth stretched drum-tight across a wooden frame, building up a pattern row by row until you’ve covered your design. Once the yarn is in place, you glue a secondary backing fabric to the back to lock everything in, trim any loose ends, and bind or hem the edges. The result is a genuine, durable rug or wall hanging, not a felt craft project. It’s a modern, faster descendant of traditional hand-tufting and punch needle rug making, sped up by a power tool that can lay down in an hour what would take a full day by hand.
Two things define the finished look. The first is pile type. A cut pile gun snips each loop of yarn as it goes, leaving a soft, plush, carpet-like texture, while a loop pile gun leaves the loops intact for a more textured, nubby surface closer to a Berber carpet.
Some guns switch between both with an interchangeable head. The second is the backing cloth (a marked tufting cloth like this one), which is not optional or interchangeable with whatever fabric you have lying around. A power tufting gun needs a stiff, tightly woven fabric built to withstand repeated punches without tearing, which is why the craft has its own dedicated cloth (more on that below), not the softer monk’s cloth used for slower, hand-powered punch needle work.
What It Costs to Start
This is where most beginners either overspend on gear they’re not sure they’ll use, or underspend on a bargain kit that fights them the whole way through their first rug. Here’s a conservative, honest breakdown of both paths.
The Honest Budget Path (Try Before You Buy)
Before you buy anything, consider a one-time rug tufting workshop at a local studio or craft space. These sessions typically run $60-$150 per person for a small rug (roughly coaster to bath-mat size), and most include the frame, cloth, yarn, and instruction, so you walk out with a finished piece and zero gear to store afterward. Some studios in expensive markets charge more, up to $250-$350, for a larger rug with more yarn and studio time, so check pricing locally before you book.
This is genuinely the smartest first move if you’re tufting-curious because of a TikTok video and don’t yet know if you’ll want to do this more than once. It answers the “will I actually like this” question for less than a tenth of the cost of a full home setup.
Buying a full setup
If you already know you want your own equipment, plan on $300-$500 for a first complete setup covering these pieces.
- Tufting gun ($80-$250). The single biggest expense and the one place quality matters most. Entry-level cut pile guns start around $80-$150 and are genuinely usable for a first rug. Mid-range guns in the $200-$250 range add more consistent motor power and are a common recommendation for people who plan to keep tufting past their first project. Cut pile is the easier starting point for nearly everyone, since it’s more forgiving of uneven pressure and mistakes are simpler to pull out and redo than with a loop pile gun.
- Frame ($10-$160). You need something to stretch the backing cloth drum-tight. Store-bought adjustable frames with tack strips run $50-$160. A basic DIY frame built from 2x4s and carpet tack strip from a hardware store can be assembled for $10-$80 if you’re reasonably handy.
- Backing cloth ($20-$40 per yard). This needs to be primary tufting cloth, a stiff, tightly woven fabric made specifically to hold up to a power gun. Monk’s cloth, the softer cotton fabric often mentioned alongside tufting, is really meant for hand-powered punch needle work; using it with a motorized gun risks tearing. Buy tufting-specific cloth, not generic canvas or burlap.
- Yarn ($20-$60 for a small rug). Acrylic yarn is the standard choice because it’s affordable, colorfast, and holds up to gluing and trimming. A small rug uses several skeins depending on color count and pile density.
- Carpet adhesive and secondary backing ($40-$55 combined). Carpet glue to seal the yarn in place runs about $25 for a gallon, which covers multiple projects, and a secondary backing fabric to finish the underside costs $15-$30.
- Scissors or an electric trimmer ($20-$50). Carpet shears for cutting yarn and evening out the pile. Sharp, dedicated shears matter more than people expect since dull scissors make trimming a fight.
After that first outlay, expect ongoing materials of roughly $75-$125 per additional rug, mostly yarn and backing.
Are cheap kits worth it?
All-in-one starter kits (gun, small frame, basic cloth, and a few yarn colors bundled together) typically run around $300 and can be a reasonable value if you’d otherwise be buying every piece separately anyway. The catch is quality control on the gun itself, which varies a lot at the low end. Look for a kit with adjustable speed and stitch length rather than a single fixed setting, since that control is what lets you fix uneven results as you learn.
A kit with a genuinely bad motor will fight you on every row, which is the fastest way to make a viral, satisfying-looking craft feel frustrating. If you’re buying a budget kit, treat the gun as the one component worth researching reviews for, even if you save money everywhere else.
How to Get Started
- Take a workshop first if you’re unsure. Search “rug tufting workshop” plus your city. An afternoon session removes almost all the guesswork before you spend on gear.
- Choose a cut pile gun for your first purchase. It’s more forgiving, easier to fix mistakes with, and the setting most beginner tutorials are built around.
- Build or buy a frame sized for a small first project. A roughly 2-by-2-foot or 2-by-3-foot frame is far easier to manage than a full rug-sized frame on your first attempt.
- Stretch primary tufting cloth across the frame drum-tight. Pull from opposite sides evenly and staple or tack it down; slack fabric is the single biggest cause of a messy first rug.
- Sketch or trace a simple design onto the cloth. Bold, chunky shapes with few small details are much easier to tuft cleanly than fine detail work.
- Tuft slowly in short, steady rows, keeping the gun perpendicular to the cloth and moving at a consistent pace rather than rushing.
- Trim, glue the secondary backing, and finish the edges once all the yarn is in place, then let the glue cure fully (usually 24 hours) before handling the rug.
Beginner Mistakes to Avoid
Loose cloth tension. Slack fabric moves as the gun punches through it, which causes uneven loops, gaps, and in bad cases, tears. Stretch the cloth drum-tight on the frame and recheck tension partway through a project, since fabric can loosen as you work it.
Wrong gun angle. Tilting the gun instead of holding it at a true 90 degree angle to the cloth produces inconsistent tuft height and patchy-looking rows. Keep the foot of the gun flush against the fabric and apply steady, even pressure rather than pushing harder in spots.
Poor yarn feeding. Tangled, pooled, or improperly threaded yarn causes breaks and skipped stitches mid-row. Use a yarn holder or feed guide so the yarn feeds smoothly into the gun, and never pull against the gun’s own feed; let it draw the yarn in at its own pace.
Using the wrong fabric. Regular canvas, burlap, or monk’s cloth is not built for the force of a motorized gun and can tear partway through a project, undoing hours of work. Stick with primary tufting cloth for any gun-based project.
Skipping or rushing the backing step. A rug with yarn but no glued secondary backing will shed and fall apart with normal use. Don’t treat the backing and edge finishing as optional cleanup; it’s what makes the piece a durable rug instead of a loose bundle of yarn.
Starting too big. A full-size rug on your first attempt means more hours of repetitive motion before you’ve built the muscle memory for consistent pressure and speed, and mistakes are more costly. A coaster, mini mat, or small wall hanging is a better first project.
Is Rug Tufting Right for You?
Rug tufting rewards people who like a hobby with a tangible, useful object at the end and who don’t mind a bit of upfront cost and mess. It’s a genuinely good fit if you enjoy working with your hands, want a project you can finish in a weekend rather than months, and have a bit of floor or wall space to mount a frame and work standing up (it’s not a hobby you do at a desk). The gun is loud enough that apartment dwellers should think about timing and neighbors, and yarn scraps get everywhere, so a garage, spare room, or covered work table helps.
It’s a tougher fit if you’re on a tight budget and unwilling to test the workshop route first, or if you want a quiet, low-mess craft you can do on the couch. If that’s more your speed, punch needle is a cheaper, quieter, entirely hand-powered cousin of tufting that uses the same basic idea (looping yarn through cloth) without the gun, the noise, or the $300-plus buy-in. It’s a reasonable stepping stone if tufting’s price tag gives you pause. Either way, this fits well alongside other productive hobbies to do with your hands and sits comfortably in the broader world of art hobbies worth trying if you’re building out a creative practice rather than picking a single craft.
Tufting has also become one of the more visible entries on lists of unique hobbies precisely because it went viral from a near standing start, and it’s a common pick among people assembling a home hobby setup that doesn’t require a subscription or a studio membership to keep going. If you’re in your twenties and searching for something with visible, shareable results, it also shows up regularly on lists of hobbies worth trying in your twenties for exactly that reason.
Rug Tufting for Beginners, in Short
Rug tufting is one of the rare viral hobbies where the finished product genuinely holds up as a real, usable rug you made yourself in a weekend. The honest path is to test it with a studio workshop before buying anything, then invest in a mid-range cut pile gun, a sturdy frame, and proper primary tufting cloth if you decide to keep going. Skip the temptation to start with a full-size rug or the cheapest gun you can find, since both make the learning curve harder than it needs to be. Get the tension, angle, and yarn feed right on a small first project, and the rest of the craft comes together fast.
FAQ: Rug Tufting for Beginners
Is rug tufting expensive to start?
It can be, if you buy a full setup right away. A complete home setup (gun, frame, cloth, yarn, glue, backing) runs $300-$500 for your first rug. A cheaper way to start is a one-time studio workshop for $60-$150, which includes materials and instruction and lets you try the craft before committing to gear.
What is the difference between monk’s cloth and primary tufting cloth?
Monk’s cloth is a softer cotton fabric meant for hand-powered punch needle work, where there’s no motorized force involved. Primary tufting cloth is a stiffer, tightly woven fabric built specifically to withstand a motorized tufting gun. Using monk’s cloth with a power gun risks tearing the fabric mid-project.
Can I use a punch needle instead of a tufting gun?
Yes. Punch needle is a slower, fully hand-powered technique that creates a similar looped texture without a motorized gun, and it costs far less to start since it skips the gun and stretched frame setup entirely. It’s a reasonable lower-cost, quieter alternative if the price or noise of gun tufting is a dealbreaker.
Is a cheap tufting gun worth it?
Budget kits around $300 can work fine for a first project, but gun quality varies a lot at the low end. Look for adjustable speed and stitch length rather than a single fixed setting, since that’s what helps you fix uneven results while you’re still learning. A poorly made motor will fight you through the whole project.
How long does it take to make a first rug?
A small rug (coaster to bath-mat size) typically takes a few hours for a first attempt, which is why most studio workshops are scheduled for a single 2.5 to 3 hour session. A larger rug at home can take a full weekend once you factor in design, tufting, gluing, and letting the backing cure before use.