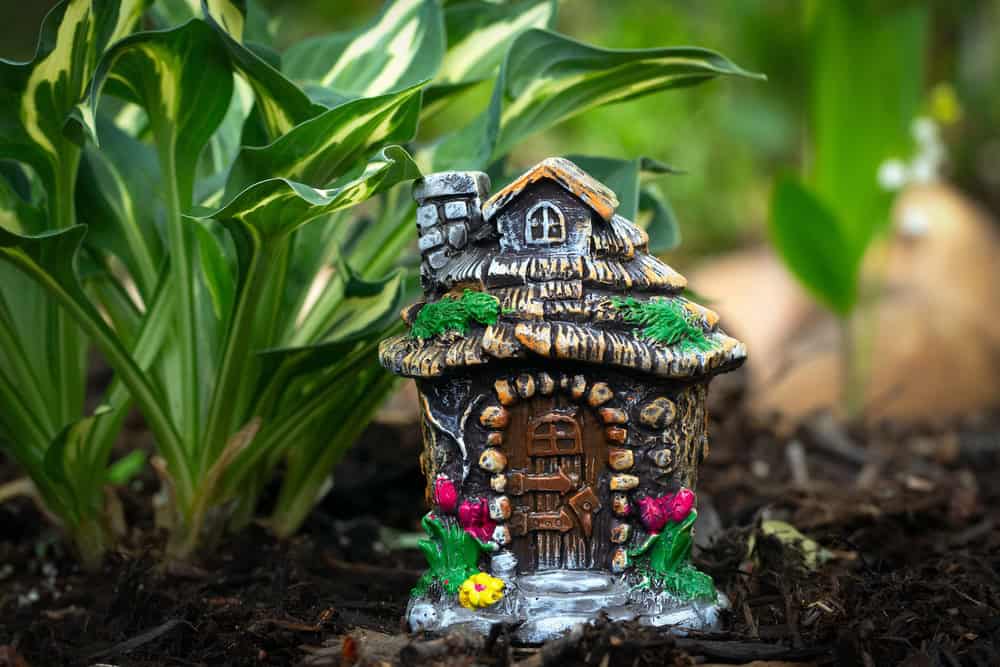
Fairy gardens are miniature landscapes built inside a pot, bowl, or garden bed and decorated with tiny plants, paths, and small accessories like fairy houses or benches. A basic starter setup costs $20 to $60 and takes about an hour to put together, and you do not need any prior gardening experience to build one that looks good.
Table of Contents
- What Is a Fairy Garden?
- What It Costs to Start
- Tools and Materials Checklist
- Choosing Your Container
- Picking Plants That Actually Survive
- How to Build Your First Fairy Garden
- Design Touches That Make It Feel Alive
- Common Mistakes Beginners Make
- Keeping It Alive
- Where to Take Fairy Gardening Next
- FAQ: Fairy Gardens for Beginners
Disclosure: some links on this page are Amazon affiliate links. As an Amazon Associate I earn from qualifying purchases.
What Is a Fairy Garden?
A fairy garden is a small-scale scene built to look like a tiny world someone (or something) could actually live in. Most people build them in a container: a shallow bowl, a wooden box, a large teacup, or a broken pot turned on its side.
The core idea is scale. Everything inside gets sized down: a path made from pebbles instead of gravel, a “tree” that is really a bonsai cutting or a dwarf conifer, a bench built from twigs. The miniature framing is what makes it read as a fairy garden instead of just a small planter.
They work indoors on a windowsill, outdoors on a patio, or built directly into a corner of an existing garden bed. Cost to start: $20-$60. Difficulty: Easy.
What It Costs to Start
You can spend as little as $15 or as much as $150, depending on whether you buy a pre-made kit or build from individual pieces.
Complete starter kits: $15-$60. These bundle a container, potting mix, a few plants or plant seeds, and a handful of accessories. They are the fastest way to get something finished in one sitting, though the plants included are often generic and the accessories tend to be plastic. One well-reviewed option is the Meadow & Oak Fairy Garden House Kit ($35.95, 4.7 stars from over 400 ratings), which includes a miniature house and accessories sized for a beginner-friendly container garden.
Container: $5-$25. A plain terracotta pot or wooden crate runs $5-$15. A ceramic bowl or a decorative ready-made planter runs $15-$25. Reusing something you already own, an old wheelbarrow, a cracked pot, a wooden crate, brings this cost to $0.
Soil: $5-$10. A basic bag of potting mix or succulent/cactus mix covers several projects. You do not need a specialty soil blend to start.
Plants: $10-$30. Small succulents and miniature ferns typically run $3-$6 per plant at a garden center. Three to five plants is enough for a first build.
Accessories: $5-$40. This is the most flexible line item. Dollar stores and craft stores regularly carry fairy figurines, tiny benches, and miniature signs for $1-$5 each. Dedicated fairy garden brands sell nicer resin houses and furniture for $10-$30 per piece.
First step: buy one succulent, one bag of potting mix, and a container you already have at home, then add accessories only after the planting looks right to you.
Tools and Materials Checklist
- A container with drainage holes, or a layer of gravel at the bottom if it does not have any
- Potting mix or succulent/cactus mix
- Small hand trowel or an old spoon
- Two to five small plants (see the plant section below)
- Decorative stones, pebbles, or sand for a path
- Sheet moss or reindeer moss for ground cover
- A few accessories: a fairy figure, a tiny house or bench, a small sign
- Watering can with a narrow spout, or a spray bottle for misting
Choosing Your Container
Almost anything with a flat bottom and some depth works. A shallow terracotta bowl, a wooden wine crate, an old metal washtub, or a broken ceramic pot laid on its side are all common starting points.
Depth matters more than width for a first project. Two to three inches of soil is enough for shallow-rooted succulents and moss, so you do not need a deep planter.
If the container does not have drainage holes, add a one-inch layer of gravel or broken pottery at the bottom before adding soil. This keeps roots from sitting in standing water, which is the fastest way to kill the plants in a fairy garden.
Indoor containers can be almost anything, including teacups, mason jars, and wooden boxes, since they never face rain or frost. Outdoor containers need to survive weather, so stick to terracotta, concrete, treated wood, or weatherproof resin.
Picking Plants That Actually Survive
Small and slow-growing is the goal. A regular houseplant can outgrow a fairy garden within a few months and throw off the miniature scale entirely.
Succulents are the most forgiving option for beginners. They tolerate irregular watering and stay small for a long time. Echeveria, string of pearls, and small jade cuttings all work well.
Moss doubles as ground cover and a stand-in for miniature grass. Sheet moss and reindeer moss (the preserved, non-growing kind) are easiest for beginners since they do not need regular watering to stay green-looking.
Miniature ferns, like button fern or Selaginella, work well for shaded indoor setups where succulents would struggle from lack of direct light.
Dwarf shrubs and bonsai starts work best in larger outdoor fairy gardens where there is enough soil depth for real root systems, standing in as the “trees” in the scene.
Avoid fast-growing houseplants like pothos or spider plants. They look fine on day one and take over the whole container within a couple of months.
How to Build Your First Fairy Garden
Step 1: Pick your spot. Indoor builds need a spot with a few hours of indirect light. Outdoor builds need at least partial shade unless you are using drought-tolerant succulents that can handle full sun.
Step 2: Prep the container. Add a gravel layer if there is no drainage, then fill with potting mix or succulent mix, leaving about half an inch of space below the rim.
Step 3: Plan the layout before planting. Set your plants and accessories on top of the soil, still in their nursery pots, and move them around until the arrangement looks right. This is the step people skip, and it is the one that makes the biggest difference in how finished the final result looks.
Step 4: Plant from back to front. Place taller plants toward the back of the container and shorter ground cover toward the front, the same way you would plant a regular garden bed. This keeps every plant visible instead of hidden behind another one.
Step 5: Add the path. Lay pebbles, sand, or wood slices in a curved line from one side of the container to the accessory area. A straight path reads as artificial; a slightly curved one reads as a real trail.
Step 6: Place accessories last. Add the fairy figure, house, or bench after the plants and path are set. Placing accessories first almost always leads to overcrowding once the plants go in.
Step 7: Water lightly and check for settling. Give the soil a light watering, let it settle for a few hours, and add a bit more soil to any spots that sank.
Design Touches That Make It Feel Alive
A few small details separate a fairy garden that looks staged from one that looks like a real miniature world.
Uneven paths. A slightly winding path with pebbles of varying size looks more natural than a straight row of matching stones.
A single focal point. One larger accessory, a house, an arch, a well, gives the eye somewhere to land. Too many same-sized pieces scattered evenly tends to look cluttered instead of charming.
Height variation. Mixing a taller plant or accessory with low ground cover creates depth, the same principle landscapers use in full-size garden beds.
A water feature, if you want one. A small dish sunk into the soil and filled with water and a few pebbles reads as a pond. It is optional, but it is one of the most common requests people search for when researching fairy garden ideas.
Common Mistakes Beginners Make
Overwatering is the single most common mistake, especially with succulents, which prefer to dry out completely between waterings. Check the soil with a finger before watering again.
Using regular houseplants instead of slow-growing, small-scale plants leads to a garden that looks great for a month and then completely loses its proportions.
Skipping drainage on a container that does not have holes is a fast way to end up with root rot, particularly outdoors where rain adds up.
Overcrowding with accessories before the plants have filled in gives the scene no room to grow and can make it look busy rather than magical.
Using non-weatherproof accessories (unsealed wood, painted items not rated for outdoor use) in an outdoor fairy garden leads to fading and warping within a season.
Keeping It Alive
Fairy gardens need less upkeep than a standard planter, but they are not maintenance-free. Check soil moisture weekly and water only when the top inch feels dry, which for most succulent-based builds means every one to two weeks indoors.
Trim any plant that starts to outgrow its spot in the layout rather than letting it take over, since keeping the scale small is what makes the whole thing work.
Rotate indoor containers every week or two so plants grow evenly instead of leaning toward the light source.
Outdoor fairy gardens in colder climates generally need to come inside, or at least be emptied of tender plants, before the first hard frost.
Where to Take Fairy Gardening Next
Fairy gardening overlaps naturally with a few other low-cost, detail-oriented hobbies. If the miniature scale is what appeals to you most, our guide to collecting miniatures covers the figures and display side of that same appeal in more depth, and the top art hobbies to try roundup has more small-scale creative projects if you want to keep building.
If you enjoy hands-on projects you can finish in an afternoon, rug tufting is a similar low-skill-ceiling craft worth trying, and the productive hobbies you can do with your hands guide has more ideas in the same spirit. Fairy gardening also skews toward gardeners and retirees, so if that describes you, our unusual hobbies for seniors to try list is worth a look too. You can browse the master list of hobbies to find something else to pair it with.
FAQ: Fairy Gardens for Beginners
How much does it cost to start a fairy garden?
A basic setup runs $20-$60 if you buy individual pieces (container, soil, a few plants, and some accessories), or $15-$60 for an all-in-one starter kit. Reusing a container you already own and shopping dollar-store accessories can bring the total under $20.
Do fairy gardens work indoors, or do they need to be outside?
Both work. Indoor fairy gardens need a spot with a few hours of indirect light and are easier to control year-round, since they never face rain, frost, or direct outdoor sun. Outdoor fairy gardens need weatherproof containers and accessories and generally need to be moved indoors or emptied before winter in colder climates.
What plants are best for a beginner fairy garden?
Small succulents, preserved moss, and miniature ferns are the most forgiving choices because they stay small and tolerate irregular watering. Avoid fast-growing houseplants like pothos, which quickly outgrow the miniature scale.
How long does it take to build a first fairy garden?
Planning the layout, planting, and adding accessories typically takes 45 minutes to an hour for a single-container build. Most of that time goes into arranging plants and accessories before anything actually gets planted, which is the step that most affects how the final result looks.