Needlepoint has quietly become one of the more surprising comeback crafts of the last few years. Etsy has reported beginner needlepoint searches up more than 170 percent year over year, and shops that sell hand-painted canvases say younger stitchers now make up the bulk of their customers.
Disclosure: some links on this page are Amazon affiliate links. As an Amazon Associate I earn from qualifying purchases.
Part of the appeal is that needlepoint looks nothing like the “grandma hobby” reputation it’s shaking off. Contemporary painted canvases now come printed with cocktails, cheeky phrases, pets, and pop culture references instead of only florals and Christmas ornaments, and the actual stitching is slow, tactile, and screen-free in a way a lot of people are actively looking for right now. This guide is for someone who has seen a modern kit online, is curious what the craft actually involves, and wants a straight answer on cost and where to start rather than a nostalgia pitch.
A workable needlepoint starter kit runs $30 to $70 for a small printed canvas, thread, and a needle, while a hand-painted canvas with proper thread and a frame realistically runs $60 to $150 depending on size and detail. Start on 13 mesh canvas with wool or pearl cotton thread and the basketweave or continental stitch, both of which are simple enough to learn from a single YouTube video. For the full range of hobbies beyond fiber crafts, browse our master list of interests and hobbies.
Table of Contents
- What Is Needlepoint?
- What It Costs to Start
- How to Get Started
- Beginner Mistakes to Avoid
- Is Needlepoint Right for You?
- FAQ: Needlepoint for Beginners
What Is Needlepoint?
Needlepoint is a form of canvas work. You stitch with a blunt tapestry needle through a stiff, open-weave canvas that has a visible grid of holes, filling in every single hole so the finished piece becomes a dense, almost fabric-like surface with no bare canvas showing through. That full coverage is the defining trait of needlepoint and the thing that separates it from most other needlecrafts, which leave background fabric visible around the design.
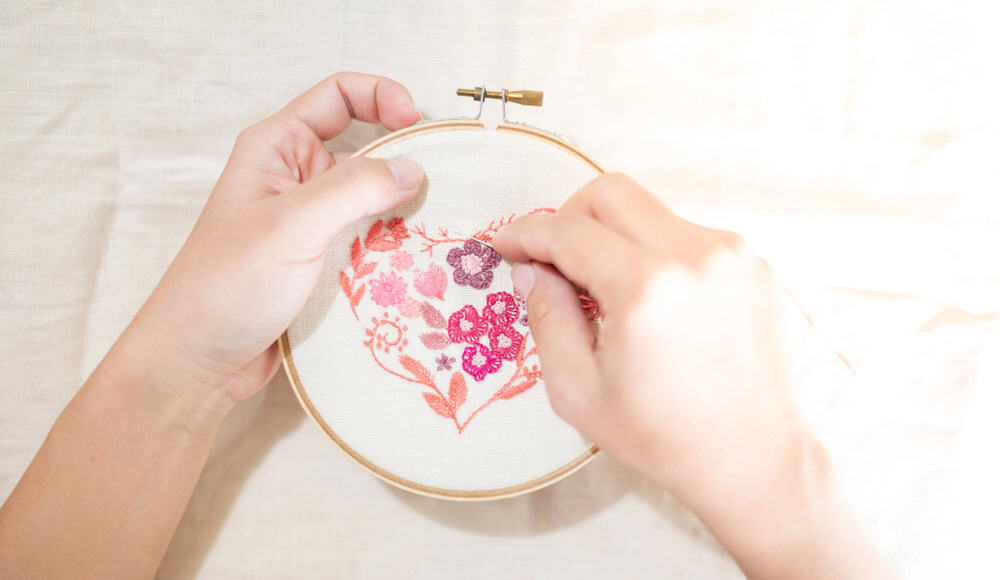
People confuse needlepoint with cross stitch and embroidery constantly, and the confusion is fair since all three involve a needle, thread, and a repeating pattern. Embroidery is the broadest term of the three.
It covers any decorative needlework done freehand on plain fabric, using dozens of different stitch types to build flowing, organic designs, and it doesn’t require a counted grid at all. Cross stitch is technically a form of embroidery that uses one stitch, an X shape, worked on an even-weave fabric like Aida cloth where the holes are evenly spaced and easy to count.
Needlepoint is worked on a stiffer mesh canvas rather than soft fabric, uses a wider range of stitches (tent, basketweave, and dozens of decorative variations), and because every hole gets filled, it produces a thicker, more durable, more three-dimensional result that holds up well as a pillow, belt, or piece meant to be handled. If you’ve also looked at punch needle, that’s a different craft again: it uses a hollow needle punched through taut fabric to create looped texture, closer in spirit to miniature rug making than to counted stitching.
Canvas comes in a mesh count, which is the number of holes per inch in each direction. Lower numbers mean bigger holes and a bolder, faster-to-stitch design. Higher numbers mean finer detail and a lot more stitches per square inch.
10 mesh is the most forgiving option, with holes large enough to see easily and stitch quickly, though fine detail like lettering or facial features won’t render well. 13 mesh is the standard for most hand-painted canvases and most beginner instruction, striking a workable balance between visible detail and a reasonable stitching pace. 18 mesh is where needlepoint gets fine and slow, since it packs in more than three times the stitches per square inch that 10 mesh does, and it’s mostly used for small, detailed pieces like ornaments once you already have some experience.
What It Costs to Start
Needlepoint’s cost spread is wide because the canvas itself can be either a mass-printed design or a piece an artist hand-painted one color at a time. Here’s a conservative breakdown of what beginners actually spend.
Blank or printed canvas, building your own kit
Blank canvas (no design, just the mesh) costs very little, usually $5 to $15 per square foot, but it means designing your own piece, which is not where most beginners want to start. Printed canvases, where a design is printed directly onto the mesh rather than hand-painted, are the more realistic entry point. A small printed canvas with a simple design runs roughly $15 to $30, and paired with a skein or two of thread and a needle, a complete starter kit in this category lands around $30 to $50.
Hand-painted canvas
Hand-painted canvases cost more because of the labor involved. An artist paints the design directly onto blank mesh, one color at a time, using acrylic paint and a fine brush, and a simple small design can take two to three hours of painting while a detailed, multi-color pillow-sized canvas can take six to eight hours or more. That labor shows up in the price: small ornament-sized hand-painted canvases typically run $40 to $70, and larger pieces like pillows or belts climb toward $90 to $150 or beyond before you’ve bought any thread. For a first project, sticking to an ornament, coaster, or small accessory-sized hand-painted canvas keeps the whole kit, canvas plus thread plus a needle, in the $60 to $100 range.
Thread, needles, and a frame
- Thread ($8 to $25 per project). Wool tapestry thread is the most forgiving choice for beginners and works well on 10 to 13 mesh canvas. Pearl cotton is a close second, giving crisp, slightly glossy stitches and coming in sizes matched to different mesh counts. Silk thread looks luxurious but costs more, frays more easily, and is better saved for once you have some stitches under your belt.
- Tapestry needles ($3 to $8 for a pack). These have a blunt tip and a large eye so they slide through canvas holes without splitting the mesh. Needle size should match your mesh count; a needle that’s too thick will distort the holes.
- Stretcher bars or a frame ($10 to $25). Optional but genuinely useful. Mounting canvas on stretcher bars keeps it taut while you stitch, which reduces the puckering and warping that happens when canvas is worked in the hand.
Add it up and a complete, workable beginner setup lands most people between $30 and $70 if you go the printed-canvas route, or $60 to $150 if you start with a small hand-painted canvas and add a frame. Either way, needlepoint costs meaningfully less to start than fiber crafts that require a powered tool. Rug tufting, for comparison, needs a motorized gun and a proper frame setup that realistically runs $300 to $500 before a first project is finished.
How to Get Started
- Pick 13 mesh canvas for your first project. It’s the standard for a reason: detailed enough to look finished, forgiving enough that mistakes are easy to spot and unpick.
- Choose a small design. A coaster, ornament, or a simple 4 to 6 inch shape is a realistic first project. Save pillow-sized or highly detailed canvases for after your first finished piece.
- Match your thread to your mesh. Wool tapestry thread or pearl cotton both work well on 10 to 13 mesh. If your canvas came with recommended thread (most painted kits do), start there rather than guessing.
- Mount the canvas on stretcher bars if you have them. Staple or tack the canvas edges to the bars so the mesh sits taut, which keeps your stitches even and limits distortion as you work.
- Learn the continental stitch first, a simple diagonal stitch worked in rows, since it’s the fastest to pick up and works well for small areas, outlines, and detail.
- Move to basketweave for larger filled areas once continental feels comfortable. It’s worked in diagonal rows rather than straight rows, uses more thread per stitch, and holds its shape far better over time, which matters for anything that will get handled or sat on.
- Cut thread in 18 to 20 inch lengths. Longer pieces twist, fray, and thin out before you finish using them.
- Stitch a small test corner before committing to the whole piece, checking that your tension is even and the canvas isn’t puckering.
- Block the finished piece if needed. A light steam from an iron, held over a damp cloth while you gently tug the canvas back into a square, corrects most of the minor distortion that comes from working the piece in your hands.
Beginner Mistakes to Avoid
Picking a mesh count that doesn’t match your eyesight or patience. 18 mesh looks impressive online, but the holes are small enough that stitching it without good lighting or reading glasses is genuinely frustrating for a first project. Start on 13 mesh and move to finer mesh once you know you enjoy the craft.
Buying the cheapest canvas available. Very low-cost, loosely woven canvas snags, frays at cut edges, and distorts more than a well-woven canvas from an established needlepoint brand. It’s not necessary to buy the most expensive option, but a mid-range canvas from a dedicated needlepoint retailer stitches noticeably more smoothly than a bargain-bin one.
Skipping the frame or stretcher bars entirely. Needlepoint canvas naturally wants to warp into a parallelogram shape as you stitch, especially with the continental stitch. Working in a frame or on stretcher bars keeps tension even and largely prevents this, saving you an aggressive blocking session later.
Pulling stitches too tight. Tension that’s too tight puckers the canvas and can distort the shape of the finished piece permanently. Aim for even, relaxed tension, snug enough that stitches lie flat but not so tight the mesh bunches underneath.
Cutting thread too long. A long thread length feels efficient because you rethread less often, but it twists, frays, and thins visibly by the time you use the last few inches. Sticking to 18 to 20 inch lengths keeps every stitch looking consistent.
Confusing needlepoint supplies with cross stitch or embroidery supplies. Cross stitch floss and Aida fabric are not interchangeable with needlepoint canvas and tapestry thread, and neither is a standard embroidery hoop a substitute for stretcher bars. Buying a “needlework starter kit” without checking which craft it’s actually for is a common first mistake.
Is Needlepoint Right for You?
Needlepoint suits people who want a slow, tactile, screen-free project with a genuinely useful or decorative end result, a pillow, a coaster, a small piece of wall art, rather than something purely decorative or disposable. It rewards patience over speed, and because a single small canvas can take anywhere from a few evenings to a few weeks depending on mesh count and design complexity, it’s a good fit if you like having one ongoing project to pick up in short sessions rather than needing to finish something in one sitting. It also travels well once mounted on stretcher bars or a small frame, which makes it a reasonable option if you’re browsing one-handed hobbies to try or otherwise need something that doesn’t demand a strong dominant hand or heavy tool control, since needlepoint’s main physical demand is a steady, light grip rather than strength.
If you’re drawn to needlepoint because you like the idea of making something with your hands and a finished object at the end, it’s worth browsing our roundup of art hobbies worth trying for other crafts in the same general lane, and if you’re specifically looking for a low-key hobby that fits into a quieter stage of life, our list of hobbies for men over 60 covers several other options with a similar pace and payoff.
It’s a tougher fit if you want fast, visible progress or dislike counted, repetitive work. Cross stitch is generally a cheaper, faster-feeling entry point if you want to test whether counted needlework appeals to you at all before committing to needlepoint’s higher canvas and thread costs. And if what actually draws you in is the finished texture of a rug or wall hanging rather than a flat stitched piece, punch needle or rug tufting get you a plusher, more three-dimensional result, with punch needle being the cheaper and quieter of the two and rug tufting being the faster but far more expensive option.
Needlepoint for Beginners, in Short
Needlepoint is a canvas-based needlecraft where you fill every hole in a mesh canvas with stitches, producing a dense, durable finished piece rather than an open, airy one. Beginners should start with 13 mesh canvas, wool or pearl cotton thread, and the continental stitch for small areas or basketweave for larger ones.
A printed canvas kit runs $30 to $70, while a small hand-painted canvas with proper thread and a frame runs $60 to $150. Keep your first project small, mount your canvas on stretcher bars if you can, watch your tension, and cut thread in short lengths. Get those basics right on a coaster or ornament-sized piece, and the rest of the craft opens up quickly from there.
FAQ: Needlepoint for Beginners
How much does it cost to start needlepoint?
A basic printed-canvas kit with thread and a needle runs $30 to $70. A small hand-painted canvas with proper thread, a needle, and stretcher bars typically runs $60 to $150, with larger or more detailed hand-painted pieces costing more. Blank canvas alone is cheap, but designing your own piece is not a realistic starting point for most beginners.
What mesh count should beginners use?
13 mesh is the standard recommendation for beginners and is what most hand-painted canvases and kits default to. It balances visible detail with a manageable stitching pace. 10 mesh is even easier to see and faster to stitch but shows less detail, while 18 mesh is best saved for once you have some experience.
What is the difference between needlepoint and cross stitch?
Needlepoint is worked on a stiff mesh canvas and fills every hole, producing a thick, durable finished piece, while cross stitch is worked on soft, even-weave fabric like Aida cloth using a single X-shaped stitch, leaving background fabric visible around the design. Needlepoint also uses a wider range of stitches, while cross stitch relies on one.
Do I need a frame or stretcher bars for needlepoint?
They’re not strictly required, but they help. Canvas naturally distorts into a parallelogram shape as you stitch it in your hands, and mounting it on stretcher bars keeps tension even and largely prevents that warping, which means less aggressive blocking once the piece is finished.