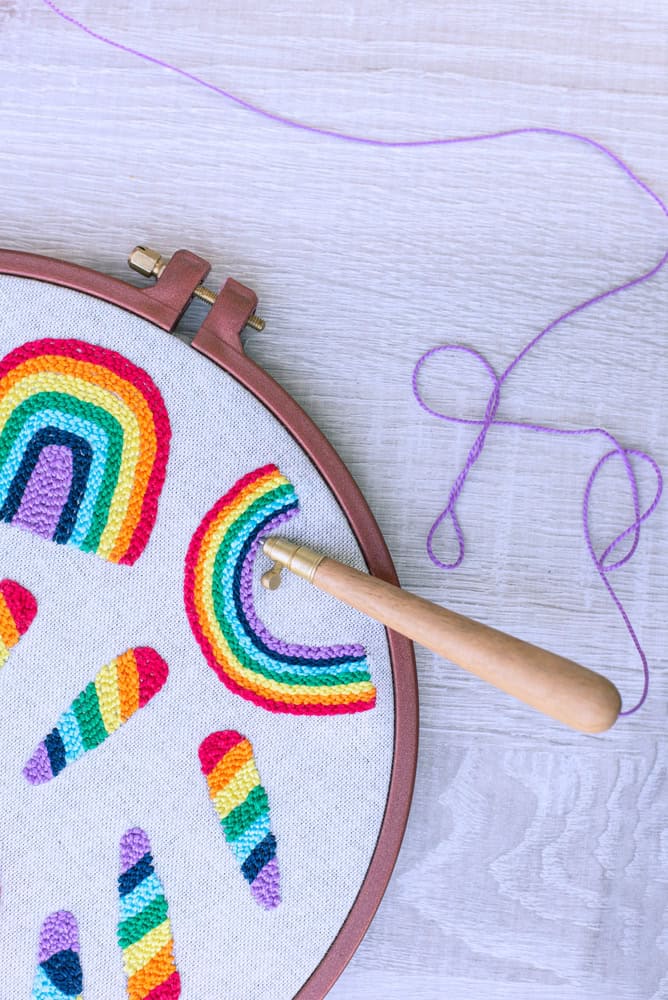
If you’ve scrolled past oddly satisfying videos of someone dragging a fat loop of yarn across a stretched piece of cloth and watched a fuzzy little design bloom on the other side, you’ve seen punch needle. It’s a hand-powered fiber craft where you push a hollow needle loaded with yarn or embroidery floss through a taut backing fabric, over and over, building a textured picture or small rug out of rows of loops.
Disclosure: some links on this page are Amazon affiliate links. As an Amazon Associate I earn from qualifying purchases.
No motor, no gun, no big workshop investment. Just a needle, some cloth in a hoop, and yarn. It’s aimed at people who want a genuinely tactile hobby they can pick up on a couch or at a kitchen table for the price of a couple of takeout dinners, not a hobby that demands a dedicated room or a few hundred dollars before you’ve made anything.
Punch needle is one of the cheapest ways into fiber arts, with most beginners spending $20-$60 on a needle, fabric, a hoop, and yarn or floss, and a finished first coaster or small piece is realistically a weekend project. The two things that matter most for a smooth start are pairing the right needle size to the right fabric weave, and keeping your yarn loose instead of pulled tight, which is the opposite instinct of most other needlework. For the full range of hobbies beyond fiber crafts, browse our master list of interests and hobbies.
Table of Contents
- What Is Punch Needle?
- What It Costs to Start
- How to Get Started
- Beginner Mistakes to Avoid
- Is Punch Needle Right for You?
- FAQ: Punch Needle for Beginners
What Is Punch Needle?
Punch needle is a fiber craft where you thread yarn or embroidery floss through a hollow or grooved needle, then punch it repeatedly through a piece of fabric stretched drum-tight in a hoop or frame. Each punch leaves a small loop on one side of the fabric. Worked in rows, those loops build up into a plush, textured surface that can look like a tiny woven rug, a fuzzy embroidered picture, or a small wall hanging, depending on how dense you pack the rows and what fiber you use.
Unlike a tufting gun, there’s no motor involved. You control speed, depth, and direction entirely by hand, which makes it slower but also quiet enough to do in an apartment at night without bothering anyone.
The detail that trips up almost every beginner is that you work from the back of the fabric. You trace or transfer your design as a mirror image onto the wrong side of the cloth, then punch through that side so the loops form on the front, the side you don’t see while you’re working. It feels backward the first time, but it’s the same logic in every punch needle pattern you’ll ever buy or download, so it’s worth internalizing early rather than fighting it project after project.
Punch needle tools generally fall into three groups. Fixed-loop needles, most associated with the Oxford brand, are self-threading through an open slot channel and produce one consistent loop height per tool, which means comfortable, ergonomic punching but a growing collection of needles if you want different loop heights or yarn weights. Adjustable needles, most associated with the Lavor brand, use a dial or sliding collar to change loop length on a single tool and cost less per needle, though they need a small plastic or wire threader to get the yarn from the handle down to the tip. Then there are all-in-one beginner kits, which bundle a basic needle (often an adjustable style), a small hoop, a swatch of pre-printed fabric, and a handful of yarn or floss colors into one box, aimed squarely at someone who wants to try the craft once before deciding whether to invest further.
What It Costs to Start
This is where punch needle earns its reputation as the budget entry point into fiber arts. Here’s a conservative breakdown of what beginners actually spend, whether you buy a bundle or piece your own kit together.
The cheap way to test it
A basic all-in-one starter kit runs about $15-$30 and typically includes a single adjustable needle, a small hoop, a pre-printed practice fabric, and a few colors of yarn or floss. This is a genuinely reasonable way to find out if you like the motion before spending more, though the fabric in budget kits is sometimes a looser weave than ideal, which can make loops feel less secure until you get your tension dialed in. Punching slowly and keeping even pressure largely compensates for a so-so fabric.
Building your own beginner kit
If you’d rather buy pieces you’ll actually want to keep using, plan on roughly $45-$70 total, broken down like this.
- Punch needle tool ($15-$35). An adjustable needle (Lavor-style) typically runs $15-$25 for one tool and gives you a range of loop heights from a single needle, which is the more flexible choice for a first purchase. A fixed-loop needle (Oxford-style) runs $25-$35 per tool, or a bit less per needle if you buy a boxed set of two sizes for around $35-$40, and is prized for comfort over long sessions but locks you into one loop height per needle you own.
- Backing fabric ($10-$18 per yard). Monk’s cloth, an evenly woven 100% cotton fabric, is the standard choice for yarn work and pairs with medium to chunky needles. Weaver’s cloth, a tighter cotton-poly blend, is the better match for embroidery floss and fine, detail-oriented needles. One yard goes a long way for small projects.
- Hoop or frame ($10-$25). Look for a “no-slip” or gripper-style hoop rather than a basic wooden embroidery hoop. Punch needle needs the fabric pulled drum-tight, and a hoop that lets fabric slip mid-project is a common source of frustration.
- Yarn or embroidery floss ($8-$20). Worsted or DK weight yarn works with medium and chunky needles; embroidery floss, usually 3-6 strands together, works with fine needles. A handful of colors covers most first projects.
- Threader tool ($2-$5, if not included). Needed for adjustable needles to guide yarn from the handle to the tip; most adjustable needles include one in the package.
Add it up and most beginners land somewhere between $20 and $60 for a complete, workable setup, with $70 as a reasonable ceiling if you buy premium fabric and a nicer hoop right away. Either path is a fraction of what a similar-feeling craft like rug tufting demands in gear before you’ve made anything.
How to Get Started
- Pick a starting path. A cheap all-in-one kit is fine for testing interest; building your own from a monk’s cloth or weaver’s cloth base plus a single adjustable needle is better if you already know you want to keep going.
- Match your fabric to your yarn and needle. Monk’s cloth with a medium or chunky needle and yarn; weaver’s cloth with a fine needle and embroidery floss. Mismatching these is the single most common source of early frustration.
- Trace your design as a mirror image on the back of the fabric. This feels counterintuitive at first, but it’s how the loops end up facing the right way on the front.
- Stretch the fabric drum-tight in a no-slip hoop or frame. Pull evenly from all sides; any slack fabric makes loops loose and uneven.
- Thread the needle correctly for its type, self-threading through the open channel on a fixed needle, or with the included threader on an adjustable one, and pull a loose puddle of yarn off the skein so it can feed freely.
- Test tension and depth on a scrap corner first. Push the needle all the way down until the handle touches the fabric, then lift it just enough to graze the surface before the next stitch, never lifting it high off the cloth.
- Punch in short, steady rows, moving the beveled opening of the needle in the direction you’re traveling so the yarn feeds smoothly instead of catching.
- Finish the piece by trimming the fabric margin, sealing the back with a light fabric glue or stiffener if you want a mountable finished piece, and hemming or framing the edges.
Beginner Mistakes to Avoid
Pairing the wrong fabric with the wrong needle. Weaver’s cloth is too tight a weave for chunky yarn needles, and monk’s cloth is too loose to hold fine floss stitches securely. Match fabric to needle size before you buy either one, not after.
Pulling the yarn tight. Almost every other needlecraft trains you to keep thread taut. Punch needle is the opposite: the yarn needs to flow loose and free through the needle’s channel, with a relaxed puddle of slack pulled off the skein nearby. Tension anywhere in that path causes skipped loops or loops that pop back out.
Punching too shallow or lifting too high. Loops that keep falling out are almost always caused by not pushing the needle all the way down until the handle meets the fabric, or by lifting the tip too far off the cloth between stitches. The needle should just graze the surface as you reposition, not come up off it.
Loose hoop tension. If the fabric can shift or sag in the hoop, your rows drift and loops loosen as you work. Re-tighten partway through a project if you notice any give, the same way you’d check a drum head.
Forgetting the design is a mirror image. Punching a pattern traced normally onto the back of the fabric, instead of flipped, means your finished piece comes out backward, which is especially obvious with lettering. Always mirror text and asymmetrical designs before tracing them onto the wrong side.
Starting with a full-size or detailed project. A dense, detailed design or a large wall hanging multiplies every one of the mistakes above before you’ve built the muscle memory to avoid them. A coaster, small hoop art piece, or simple shape is a far better first project than anything with fine text or a big surface area.
Is Punch Needle Right for You?
Punch needle fits people who want a quiet, low-cost, low-commitment way into fiber arts, something you can do at a kitchen table or on a couch with a hoop in your lap, without buying a power tool or dedicating floor space. It’s also genuinely one of the more forgiving crafts to pick back up after weeks away, since there’s no machine to maintain and the materials keep indefinitely in a drawer. If you like productive hobbies you can do with your hands while half-watching TV, this is about as accessible as that category gets, and it sits comfortably alongside the broader world of art hobbies worth trying if you want a creative outlet that produces a real object.
It’s a tougher fit if what you actually want is a big, fast, high-impact finished piece like a full rug, or if you find slow, repetitive motion boring rather than calming. That’s really the territory of rug tufting, punch needle’s louder, faster, and far more expensive cousin. Where a full punch needle setup runs $20-$60, a home tufting rig with a motorized gun, frame, and proper backing cloth realistically runs $300-$500 before you’ve finished your first project.
If you’re curious about that end of the fiber arts spectrum, our rug tufting for beginners guide breaks down the real costs and gear. Punch needle is worth trying first if the tufting price tag or the noise of a gun gives you pause, since it teaches the same core idea (loops of yarn through stretched cloth) at a tenth of the buy-in.
If you’d rather spend your hobby time on something that leans more on strategy or figuring things out than on repetitive hand motion, it’s worth also looking at our roundup of problem-solving hobbies, which sits at almost the opposite end of the mental-engagement spectrum from punch needle’s meditative repetition. And because punch needle asks for a light, steady touch rather than grip strength or a strong dominant hand, it’s also worth a look if you’re browsing one-handed hobbies to try or otherwise working around limited hand mobility, since there’s no heavy tool to wrestle the way there is with a tufting gun.
Punch Needle for Beginners, in Short
Punch needle earns its spot as one of the cheapest real entry points into fiber arts. A cheap kit gets you punching for $15-$30, and a proper beginner build with monk’s cloth or weaver’s cloth, a matched needle, a no-slip hoop, and some yarn or floss lands most people at $20-$60. Match your fabric to your needle and yarn weight before you buy, keep the yarn loose instead of taut as you punch, push the needle all the way down on every stitch, and start with something small. Get those basics right on a coaster-sized first project, and the technique clicks fast.
FAQ: Punch Needle for Beginners
How much does it cost to start punch needle?
Most beginners spend $20-$60 total on a needle, backing fabric, a hoop, and yarn or floss. A basic all-in-one starter kit can run as little as $15-$30 if you just want to test whether you like it before building out a proper kit.
What is the difference between monk’s cloth and weaver’s cloth?
Monk’s cloth is an evenly woven, 100% cotton fabric that’s the standard choice for yarn-based punch needle work with medium to chunky needles. Weaver’s cloth is a tighter cotton-poly blend better suited to embroidery floss and fine needles. Using the wrong one for your needle size is one of the most common beginner frustrations.
Do I punch needle from the front or the back of the fabric?
You work from the back. Trace or transfer your design as a mirror image onto the wrong side of the fabric, then punch through that side so the finished loops appear correctly on the front, which is the side you don’t see while working.
How is punch needle different from rug tufting?
Punch needle is entirely hand-powered and costs roughly $20-$60 to start. Rug tufting uses a motorized gun to punch yarn much faster and is aimed at full-size rugs, but a home setup realistically runs $300-$500. Punch needle is a quieter, cheaper way to try the same basic technique (looping yarn through stretched cloth) before deciding whether to invest in a gun.